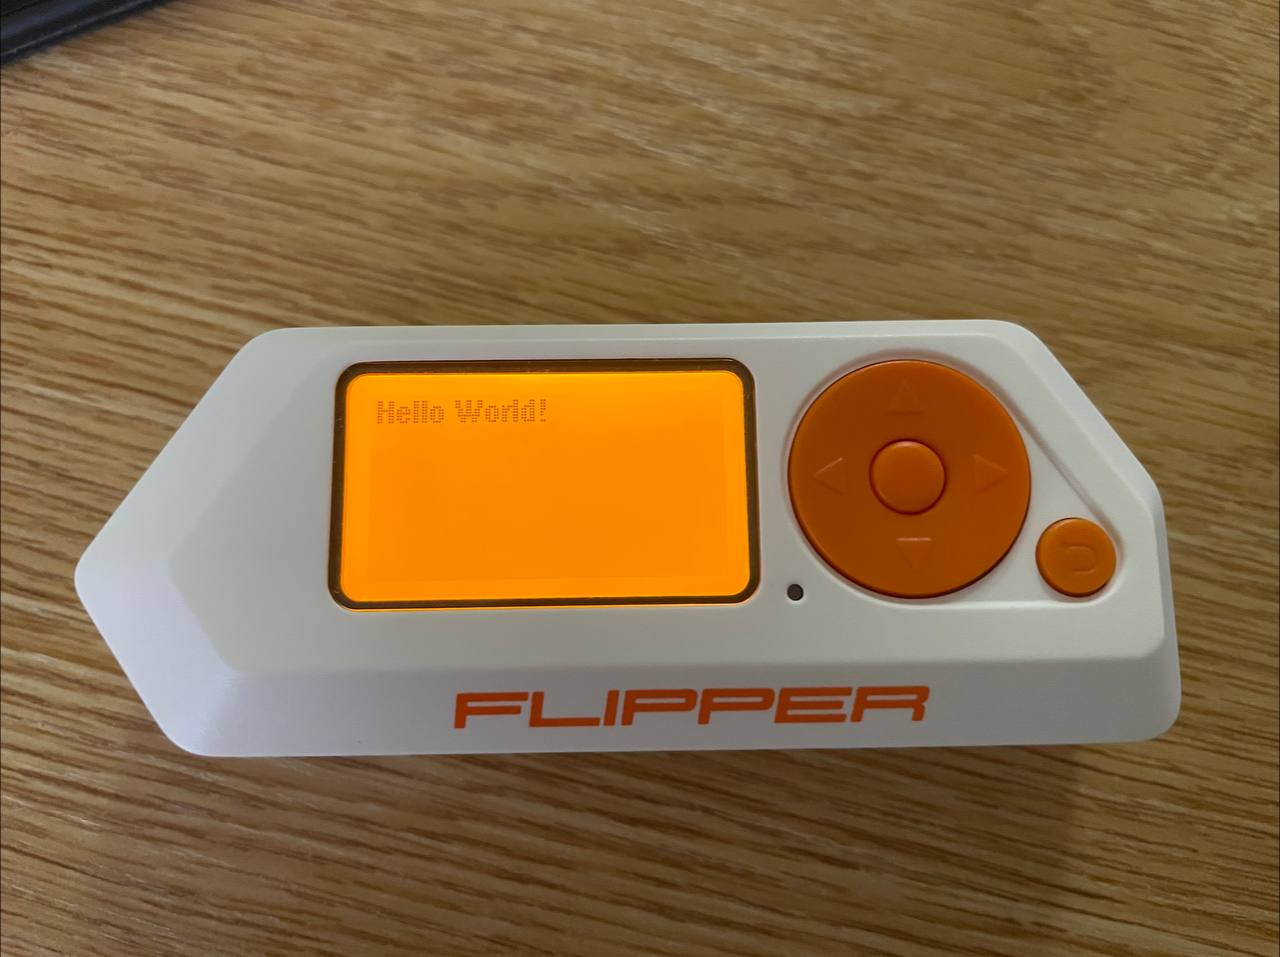
A step-by-step history of the code developed in this post is available on GitHub.
Last weekend, my hacker Tamagotchi—the Flipper Zero I backed on Kickstarter back in August 2020—finally arrived. After copying all my keys and passes for work and parking, and turning off a couple of televisions and air conditioners, I naturally wanted more. “More” included trying various alternative firmware builds and, of course, attempting to write some Flipper code myself.
Unfortunately, it quickly became clear that there was no documentation for creating custom applications, the API was undocumented, and the only tutorial on GitHub did not compile because the API had changed dramatically in the six months since its publication. I had to read the code of other applications and work out what was happening by intuition. This tutorial is the result of that reading. I wonder how quickly it will become obsolete. 🤔
UPDATE. The Flipper developers say that documentation will appear once the API has stabilised. I can confirm that it changes often, so setting anything in concrete would probably be premature.
Building the firmware
Unexpectedly, the first thing you need to learn before writing an application is how to build the firmware. The procedure is the same for official and modified firmware, so these instructions currently apply to either.
While studying the firmware repository, I found a Brewfile containing the macOS dependencies. I could not use it because, for example, the listed gdb cannot be installed from Homebrew on an M1 Mac. I therefore installed several packages manually:
brew install protobuf protobuf-c dfu-util gcc-arm-embeddedUPDATE. As it turns out, none of that was necessary either. Git is all you need. The Flipper Build Tool included in the repository—
fbt; read on—takes care of every dependency itself.
The next step is to clone the repository with all of its submodules.
git clone --recursive https://github.com/flipperdevices/flipperzero-firmware.gitUPDATE. When I was first learning about the firmware and reading the user chats, nearly every “why doesn't this work?” question was answered by saying that omitting
--recursivewas the classic beginner's mistake and that the flag was essential. As it turns out, this is not true:fbt—which appears literally one paragraph from now—downloads everything itself regardless of how you clone the repository.
Cloning with the submodules downloads a full gigabyte of assorted material.
du -sh flipperzero-firmware
1,0G	flipperzero-firmware
Our main friend among all this is fbt, the Flipper Build Tool, which we will use to build both firmware and applications. The first time it is launched without arguments, it downloads a toolchain containing gcc-arm, suggesting that installing gcc-arm-embedded from Homebrew was unnecessary. Annoyingly, it downloads the x86_64 version even on my M1 Mac, although an aarch64 build also exists. Until Apple disables Rosetta 2, however, this is only an aesthetic concern.
./fbt
Checking tar..yes
Checking downloaded toolchain tgz..no
Checking curl..yes
Downloading toolchain:
######################################################################### 100,0%
done
Removing old toolchain..done
Unpacking toolchain:
####################################################### 100.0%
done
Clearing..done
The firmware is then built in debug mode, which is what happens when fbt is run without arguments. For me, this produced an error:
  ...
	APPS	build/f7-firmware-D/applications/applications.c
	ICONS	build/f7-firmware-D/assets/compiled/assets_icons.c
	CC	applications/main/archive/scenes/archive_scene.c
	CC	applications/main/bad_usb/scenes/bad_usb_scene.c
	PREGEN	build/f7-firmware-D/sdk_origin.i
	SDKSRC	build/f7-firmware-D/sdk_origin.i
	CC	applications/main/gpio/scenes/gpio_scene.c
	CC	applications/main/gpio/gpio_item.c
	CC	applications/main/gpio/usb_uart_bridge.c
	CC	applications/main/ibutton/scenes/ibutton_scene.c
	CC	applications/main/ibutton/ibutton_cli.c
	CC	applications/main/infrared/scenes/infrared_scene.c
In file included from applications/services/gui/canvas.h:9,
                 from ./applications/services/dialogs/dialogs.h:3,
                 from build/f7-firmware-D/sdk_origin.i.c:124:
applications/services/gui/icon_animation.h:10:10: fatal error: assets_icons.h: No such file or directory
   10 | #include <assets_icons.h>
      |          ^~~~~~~~~~~~~~~~
compilation terminated.
scons: *** [build/f7-firmware-D/sdk_origin.i] Error 1
********** ERRORS **********
Failed building build/f7-firmware-D/sdk_origin.i: Error 1
I opened an issue in the official firmware repository on GitHub and received a response 12 minutes later:
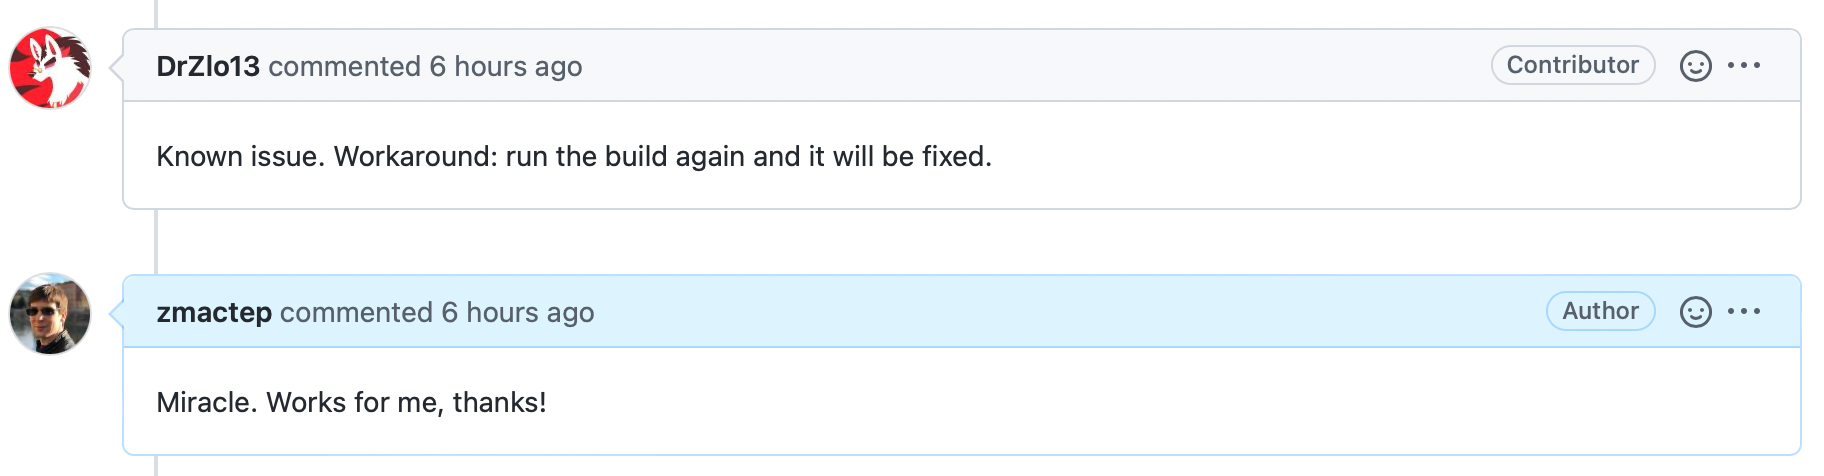
Indeed, restarting fbt solves the problem:
./fbt
... list of every file being compiled ...
	INFO
Loaded 74 app definitions.
Firmware modules configuration:
Service:
	 bt, cli, dialogs, dolphin, desktop, gui, input, loader, notification, power, storage
System:
	 updater_app, storage_move_to_sd
App:
	 subghz, lfrfid, nfc, infrared, gpio, ibutton, bad_usb, u2f, fap_loader
Archive:
	 archive
Settings:
	 bt_settings, notification_settings, storage_settings, power_settings, desktop_settings, passport, system_settings, about
StartupHook:
	 crypto_start, rpc_start, infrared_start, nfc_start, subghz_start, lfrfid_start, ibutton_start, bt_start, power_start, storage_start, updater_start, storage_move_to_sd_start
Package:
	 basic_services, main_apps, settings_apps, system_apps
Firmware size
.text         598400 (584.38 K)
.rodata       157768 (154.07 K)
.data           1444 (  1.41 K)
.bss            8432 (  8.23 K)
.free_flash   290628 (283.82 K)
	HEX	build/f7-firmware-D/firmware.hex
	BIN	build/f7-firmware-D/firmware.bin
Setting build/f7-firmware-D as latest built dir (./build/latest/)
firmware.bin:  186 flash pages (last page 4.59% full)
	DFU	build/f7-firmware-D/firmware.dfu
2022-10-24 18:12:46,569 [INFO] Firmware binaries can be found at:
	dist/f7-D
We will not flash this firmware onto the Flipper. Instead, we will move on to writing our application.
The last and entirely optional step here is to create a Visual Studio Code project. I find it convenient to write code there, so I was pleased to discover this option—especially because it takes a single command using the same fbt:
./fbt vscode_dist
	INSTALL	.vscode/c_cpp_properties.json
	INSTALL	.vscode/launch.json
	INSTALL	.vscode/settings.json
	INSTALL	.vscode/tasks.json
Creating an application
The canonical way to create new applications is to place them in the applications_user directory.
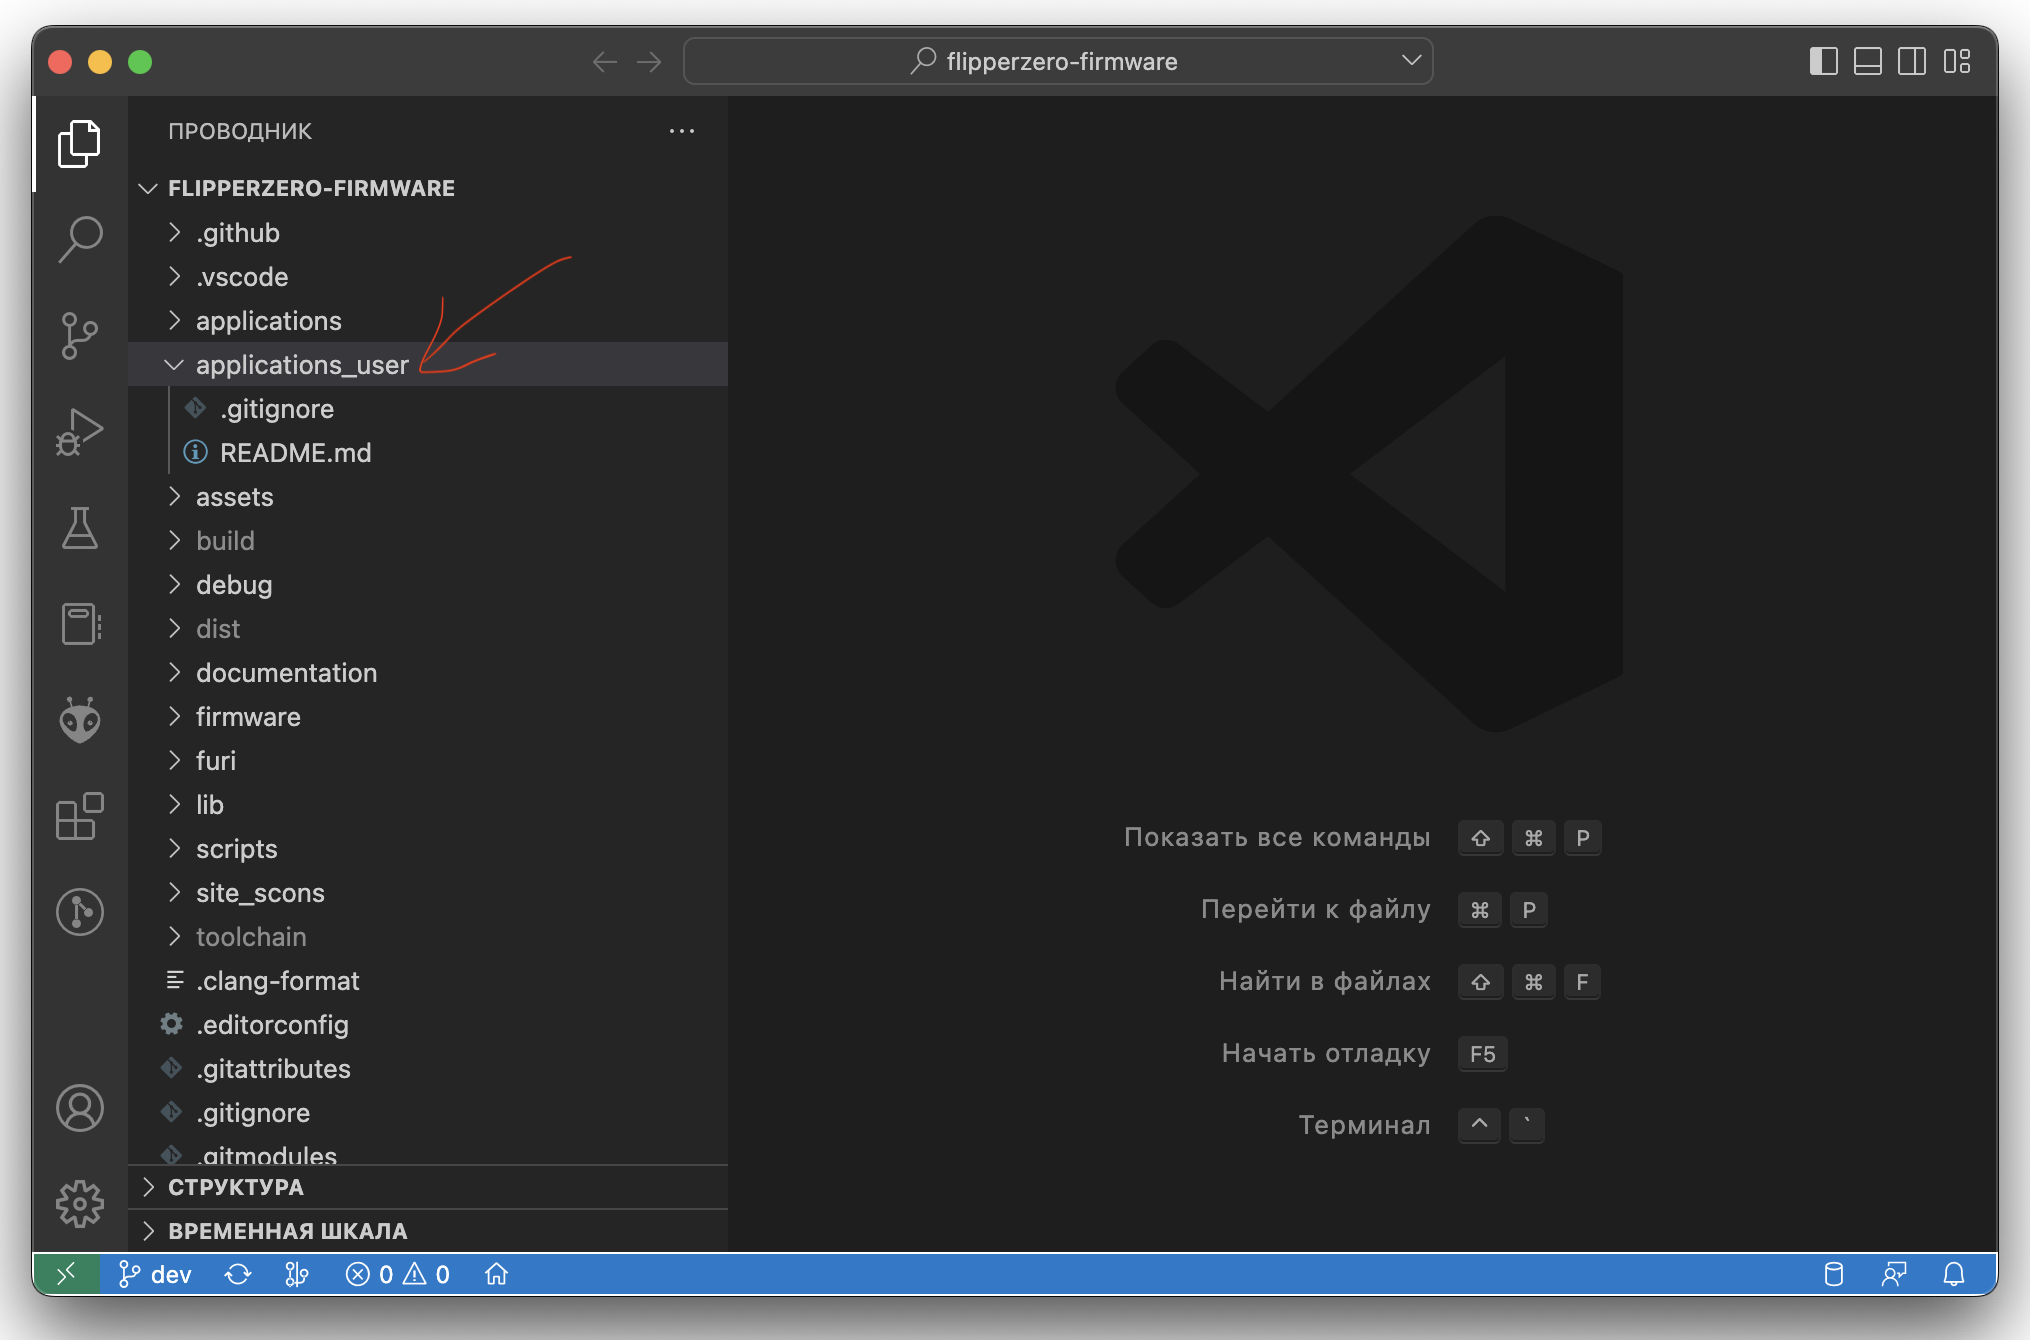
First, we will create the simplest application that compiles. It will not actually do anything yet, but we will fix that too.
Create an application directory named, naturally, hello_world, and add three files:
- a C source file containing the program code,
hello_world.c; - a Flipper Application Manifest,
application.fam; - a 10×10-pixel black-and-white PNG application icon,
hello_world.png.
As always, the icon is the hardest part, so here is one for you.

Now let us examine the code. By Flipper Zero convention, the entry point is a function named after our application with the suffix app. As is traditional in C, the function returns an error code—zero means everything is fine—and accepts some data through a pointer. We do not need the data, so the code, including an include for int32_t, looks like this:
#include <stdio.h>

int32_t hello_world_app(void *p) {
    return 0;
}
Unfortunately, this ingenious code does not compile. The project enables fairly strict rules by default, treating every warning as an error. We can solve the problem by pretending to use the data after all:
#include <stdio.h>

int32_t hello_world_app(void* p) {
  (void)(p);

  return 0;
}
Excellent. All that remains is the manifest, which allows the magical fbt to understand that we are creating a new application. There is even some documentation for this file, from which we can learn the following:
appidcontains a unique name without spaces thatfbtuses to build our application.namecan contain anything; this is the application's display name on the Flipper.apptypespecifies the type of application. For all our creations, as long as we stay out of the system itself, this isFlipperAppType.EXTERNAL.entry_pointspecifies the entry point: the function we wrote above.fap_iconspecifies the application icon.fap_categorysays which category the application belongs to, such asGPIO,Music,Misc, orTool.
Armed with this knowledge, we can construct the following manifest:
App(
    appid="hello_world",
    name="Hello World",
    apptype=FlipperAppType.EXTERNAL,
    entry_point="hello_world_app",
    cdefines=["APP_HELLO_WORLD"],
    requires=[
        "gui",
    ],
    stack_size=1 * 1024,
    order=90,
	fap_icon="hello_world.png",
    fap_category="Misc",
)
That is it: we can build our application. The command is:
./fbt fap_{OUR APPLICATION'S APPID}In our case:
./fbt fap_hello_world
        CC      applications_user/hello_world/hello_world.c
        SDKCHK  firmware/targets/f7/api_symbols.csv
        LINK    build/f7-firmware-D/.extapps/hello_world_d.elf
API version 5.0 is up to date
        APPMETA build/f7-firmware-D/.extapps/hello_world.fap
        FAP     build/f7-firmware-D/.extapps/hello_world.fap
        APPCHK  build/f7-firmware-D/.extapps/hello_world.fap
And that is all. The build/f7-firmware-D/.extapps directory now contains our FAP file, which can be transferred to the Flipper in any convenient way. I used qFlipper:
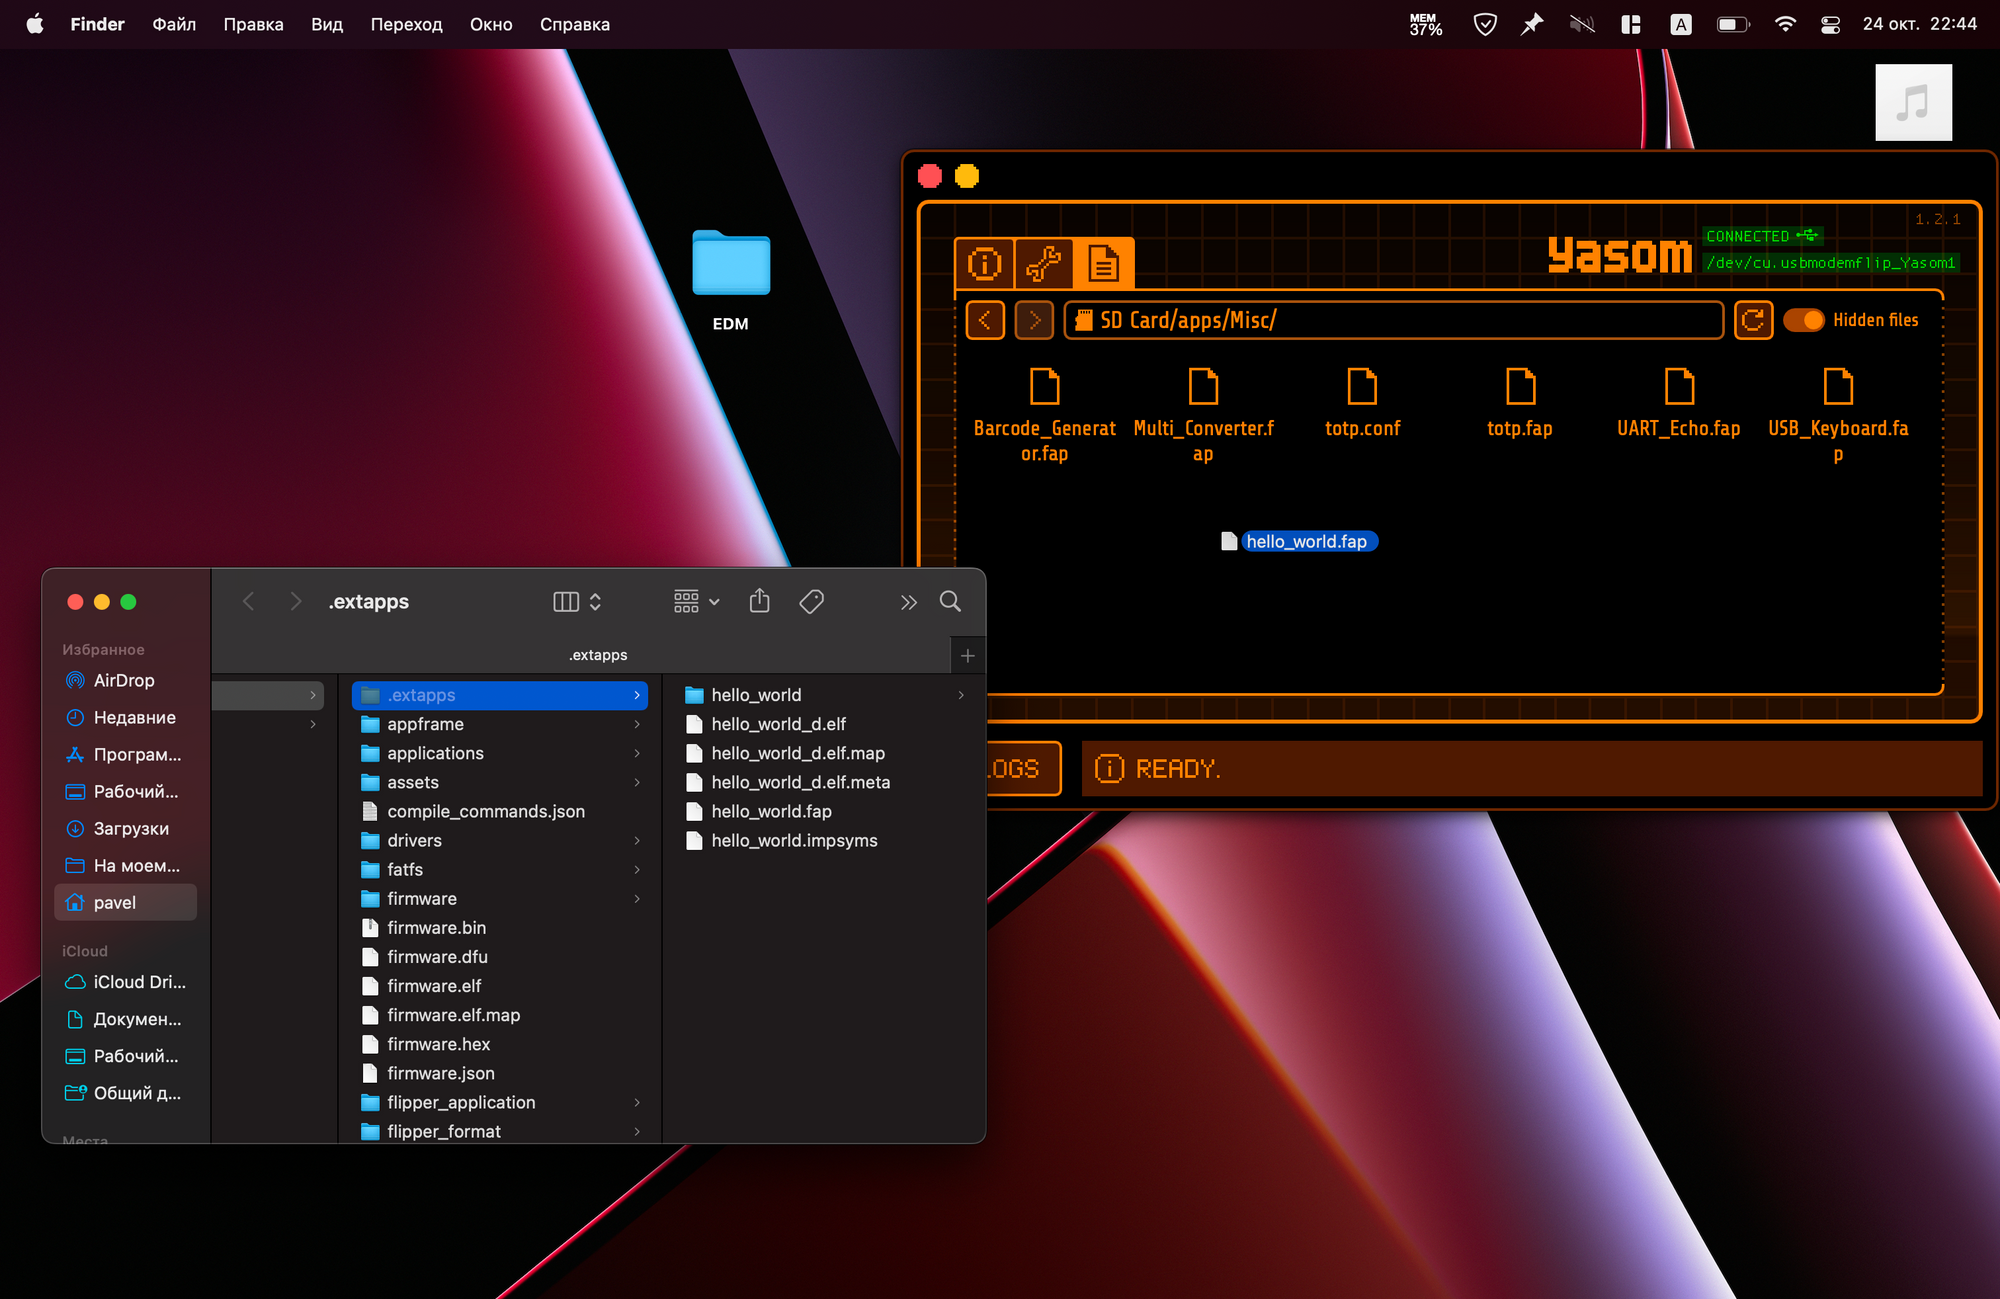
UPDATE. Advanced users do not wave a mouse around; they perform operations like this using
fbtfrom the command line or Visual Studio Code. Here is the command:./fbt launch_app APPSRC=hello_world.
The application then appears in the list in the desired directory:
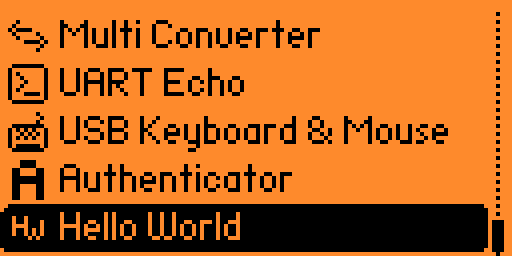
Launching it produces no errors: the function executes faithfully and the application immediately exits. That is clearly not why we are here, so let us wade into the shallows of application architecture that I pieced together over a couple of hours of tinkering.
Message queue
Like many graphical frameworks, Flipper organises its work around a message queue. In practice, it looks roughly like this:
MESSAGE_QUEUE = new_message_queue()

infinite_loop {
  MESSAGE = take_message_from(MESSAGE_QUEUE)

  if there_is_a MESSAGE {
    clever_processing(MESSAGE)
  }
}

free_queue(MESSAGE_QUEUE)
This takes me straight back to writing WinAPI32 code 15 years ago.
To use this functionality, stdio.h alone is no longer sufficient; we need headers from the Flipper SDK. It is called FURI. I read somewhere that this stands for Flipper Universal Registry Implementation. The implementation seems to have moved far beyond that name, but the abbreviation is excellent, so it stayed. We will also include several other headers immediately:
gui/gui.hhandles the interface.input/input.hcontains data structures and functions for button messages.notification/notification_messages.hcontains data structures and functions for notifications such as the LED.
If you do not need any of these, remove them freely. My source file now looks like this:
#include <stdio.h>
#include <furi.h>
#include <gui/gui.h>
#include <input/input.h>
#include <notification/notification_messages.h>

int32_t hello_world_app(void* p) {
    UNUSED(p);

    return 0;
}
UNUSED is a macro defined in FURI. Its implementation is exactly the same as the code we used before, but it looks nicer.
As far as I understand—and I may be badly mistaken—the message queue does not care at all what kind of messages it stores. This lets you define exactly the set of events you want. When creating a queue, you specify only its capacity—how many events it can store before it is “exhausted”—and the size of each event.
We will begin by supporting just one type of event: InputEvent, defined in input/input.h, representing button events. To do this, modify our function as follows:
#include <stdio.h>
#include <furi.h>
#include <gui/gui.h>
#include <input/input.h>
#include <notification/notification_messages.h>

int32_t hello_world_app(void* p) {
    UNUSED(p);

    // The current InputEvent
    InputEvent event;
    // A queue for eight events, each the size of InputEvent
    FuriMessageQueue* event_queue = furi_message_queue_alloc(8, sizeof(InputEvent));

    // Process the event queue forever
    while(1) {
        // Read an event from the queue into event, waiting forever if the queue is empty,
        // and check that the operation succeeded
        furi_check(furi_message_queue_get(event_queue, &event, FuriWaitForever) == FuriStatusOk);

        // Leave the loop, and therefore the application, when Back is pressed
        if(event.key == InputKeyBack) {
            break;
        }
    }

    // Free the memory used by the queue
    furi_message_queue_free(event_queue);

    return 0;
}
If you compile this application, copy it to the device, and launch it, your Flipper displays the following screen forever and ignores every button. Only a reboot—Left plus Back—will save you.
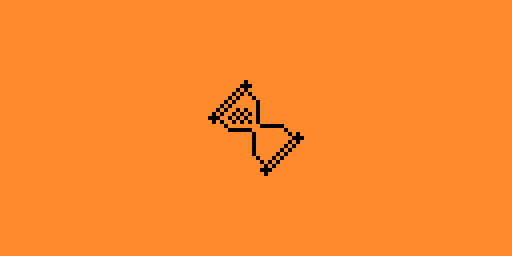
Why does this happen? We are obviously stuck in an infinite loop, but should pressing Back not interrupt it?
No, because our message queue is still empty. We read from it but never write to it. On the Flipper, we have to do that ourselves too. Let us work out how. First, however, we need to understand the GUI.
Graphical interface
To be honest, I did not study this part very deeply, but the general idea is straightforward. We create a GUI that initialises our system. We attach a view port that specifies where the interface will be rendered—obviously full-screen for our simple application—and then attach callbacks for drawing and for the events we support, including those button presses.
There is a lot of new code, so we will start with small pieces. First, create a new view port. This is simple and takes no arguments.
ViewPort* view_port = view_port_alloc();
Create callbacks for drawing with view_port_draw_callback_set and handling button presses with view_port_input_callback_set. In both cases, besides the view port and callback function, we can pass arbitrary context into the callback. We do not need any context for drawing yet, but it is convenient to give the input callback a pointer to the message queue so that it can place button presses there:
view_port_draw_callback_set(view_port, draw_callback, NULL);
view_port_input_callback_set(view_port, input_callback, event_queue);
Now create the application's overall GUI and attach the view port in full-screen mode:
Gui* gui = furi_record_open(RECORD_GUI);
gui_add_view_port(gui, view_port, GuiLayerFullscreen);
After leaving the infinite loop, we now have to clean up not only the message queue but also the new objects:
gui_remove_view_port(gui, view_port);
view_port_free(view_port);
furi_record_close(RECORD_GUI);
Putting the entire function together gives us:
int32_t hello_world_app(void* p) {
    UNUSED(p);

    // The current InputEvent
    InputEvent event;
    // A queue for eight events, each the size of InputEvent
    FuriMessageQueue* event_queue = furi_message_queue_alloc(8, sizeof(InputEvent));

    // Create a new view port
    ViewPort* view_port = view_port_alloc();
    // Set a drawing callback without context
    view_port_draw_callback_set(view_port, draw_callback, NULL);
    // Set a button callback, passing our message queue as context
    // so that button events can be placed in it
    view_port_input_callback_set(view_port, input_callback, event_queue);

    // Create the application GUI
    Gui* gui = furi_record_open(RECORD_GUI);
    // Attach the view port to the GUI in full-screen mode
    gui_add_view_port(gui, view_port, GuiLayerFullscreen);

    // Process the event queue forever
    while(1) {
        // Read an event from the queue into event, waiting forever if the queue is empty,
        // and check that the operation succeeded
        furi_check(furi_message_queue_get(event_queue, &event, FuriWaitForever) == FuriStatusOk);

        // Leave the loop, and therefore the application, when Back is pressed
        if(event.key == InputKeyBack) {
            break;
        }
    }

    // Free the memory used by the queue
    furi_message_queue_free(event_queue);

    // Clean up the interface objects
    gui_remove_view_port(gui, view_port);
    view_port_free(view_port);
    furi_record_close(RECORD_GUI);

    return 0;
}
Now we need to write the callbacks themselves. We will start with draw_callback, which is responsible for drawing. It accepts two arguments: a canvas on which we draw and some context. We do not use the context, so we apply the familiar UNUSED macro. We clear the canvas every time the function is called.
static void draw_callback(Canvas* canvas, void* ctx) {
    UNUSED(ctx);

    canvas_clear(canvas);
}
We can also draw and write on the screen in this function. To keep the application from being entirely joyless, let us add the cherished words “Hello World!” immediately after clearing the canvas. We need to choose a font and place the text at some coordinates. The coordinates specify an object's bottom-left corner and are measured from the screen's top-left corner.
static void draw_callback(Canvas* canvas, void* ctx) {
    UNUSED(ctx);

    canvas_clear(canvas);
    canvas_set_font(canvas, FontPrimary);
    canvas_draw_str(canvas, 0, 10, "Hello World!");
}
We handle the button callback similarly. It receives an InputEvent representing the button press and the context we supplied. The function is simple: obtain the queue from the context and place the incoming event in it.
static void input_callback(InputEvent* input_event, void* ctx) {
    // Check that the context is not null
    furi_assert(ctx);
    FuriMessageQueue* event_queue = ctx;

    furi_message_queue_put(event_queue, input_event, FuriWaitForever);
}
For completeness, here is the entire current hello_world.c file:
#include <stdio.h>
#include <furi.h>
#include <gui/gui.h>
#include <input/input.h>
#include <notification/notification_messages.h>

static void draw_callback(Canvas* canvas, void* ctx) {
    UNUSED(ctx);

    canvas_clear(canvas);
    canvas_set_font(canvas, FontPrimary);
    canvas_draw_str(canvas, 0, 10, "Hello World!");
}

static void input_callback(InputEvent* input_event, void* ctx) {
    // Check that the context is not null
    furi_assert(ctx);
    FuriMessageQueue* event_queue = ctx;

    furi_message_queue_put(event_queue, input_event, FuriWaitForever);
}

int32_t hello_world_app(void* p) {
    UNUSED(p);

    // The current InputEvent
    InputEvent event;
    // A queue for eight events, each the size of InputEvent
    FuriMessageQueue* event_queue = furi_message_queue_alloc(8, sizeof(InputEvent));

    // Create a new view port
    ViewPort* view_port = view_port_alloc();
    // Set a drawing callback without context
    view_port_draw_callback_set(view_port, draw_callback, NULL);
    // Set a button callback, passing our message queue as context
    // so that button events can be placed in it
    view_port_input_callback_set(view_port, input_callback, event_queue);

    // Create the application GUI
    Gui* gui = furi_record_open(RECORD_GUI);
    // Attach the view port to the GUI in full-screen mode
    gui_add_view_port(gui, view_port, GuiLayerFullscreen);

    // Process the event queue forever
    while(1) {
        // Read an event from the queue into event, waiting forever if the queue is empty,
        // and check that the operation succeeded
        furi_check(furi_message_queue_get(event_queue, &event, FuriWaitForever) == FuriStatusOk);

        // Leave the loop, and therefore the application, when Back is pressed
        if(event.key == InputKeyBack) {
            break;
        }
    }

    // Free the memory used by the queue
    furi_message_queue_free(event_queue);

    // Clean up the interface objects
    gui_remove_view_port(gui, view_port);
    view_port_free(view_port);
    furi_record_close(RECORD_GUI);

    return 0;
}
Compile, upload, and enjoy!
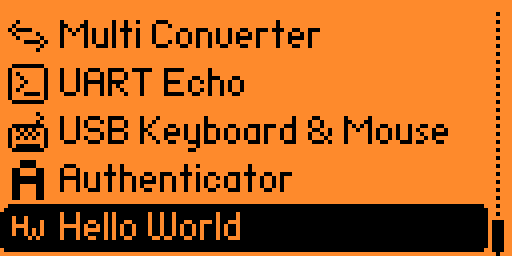

Not only do we have “Hello World!” on the screen—perhaps a non-zero left margin would have been wise—but the Back button closes the application!
Timer
The article could end here, but I wanted to add two more elements: a timer and a blinking LED. This is not for the love of art; it demonstrates custom events in the queue, which are easiest to show with a timer.
A timer is as easy to add as the previous events and does not require GUI initialisation. When creating one, we specify a callback, the timer type—periodic in our case—and the callback context.
FuriTimer* timer = furi_timer_alloc(timer_callback, FuriTimerTypePeriodic, event_queue);
Next, start the timer so that it fires every 500 milliseconds:
furi_timer_start(timer, 500);
And at the end, of course, free its memory:
furi_timer_free(timer);
The callback function also looks familiar:
static void timer_callback(FuriMessageQueue* event_queue) {
    // Check that the context is not null
    furi_assert(event_queue);

    // What do we do here?!
}
This raises the question of what to do inside the callback. It would be useful to place events in event_queue, just as before, and then retrieve them in the infinite loop. Unfortunately, our queue stores events of only one type: InputEvent. It is time to fix that.
Custom events
Our wonderful program now needs two kinds of events: button presses and timer ticks. This is easy to implement in the existing code. The plan is:
- enumerate the possible events with an
enum; - define a custom structure containing the event type and an optional payload, such as the pressed button for input events;
- modify the queue to accept those events;
- modify every call to
furi_message_queue_putto wrapFURIevents in our custom events; - modify the event-processing loop to handle different event types.
Let us follow the plan. The additional structures we need look like this:
typedef enum {
    EventTypeTick,
    EventTypeInput,
} EventType;

typedef struct {
    EventType type;
    InputEvent input;
} HelloWorldEvent;
We place the complete InputEvent directly into our event as its payload. We could extract only the information we need, of course, but this is simpler and saves us from thinking.
Now modify the queue:
// The current custom HelloWorldEvent
HelloWorldEvent event;
// A queue for eight events, each the size of HelloWorldEvent
FuriMessageQueue* event_queue = furi_message_queue_alloc(8, sizeof(HelloWorldEvent));
Wrap the event in input_callback:
static void input_callback(InputEvent* input_event, void* ctx) {
    // Check that the context is not null
    furi_assert(ctx);
    FuriMessageQueue* event_queue = ctx;

    HelloWorldEvent event = {.type = EventTypeInput, .input = *input_event};
    furi_message_queue_put(event_queue, &event, FuriWaitForever);
}
And wrap an event in the timer callback:
static void timer_callback(FuriMessageQueue* event_queue) {
    // Check that the context is not null
    furi_assert(event_queue);

    HelloWorldEvent event = {.type = EventTypeTick};
    furi_message_queue_put(event_queue, &event, 0);
}
All that remains is to handle events correctly in the loop:
// Process the event queue forever
while(1) {
    // Read an event from the queue into event, waiting forever if the queue is empty,
    // and check that the operation succeeded
    furi_check(furi_message_queue_get(event_queue, &event, FuriWaitForever) == FuriStatusOk);

    // The event is a button press
    if (event.type == EventTypeInput) {
        // Leave the loop, and therefore the application, when Back is pressed
        if (event.input.key == InputKeyBack) {
            break;
        }
    // The event is a timer tick
    } else if (event.type == EventTypeTick) {
        // Do something on the timer
    }
}
As before, here is the complete current version:
#include <stdio.h>
#include <furi.h>
#include <gui/gui.h>
#include <input/input.h>
#include <notification/notification_messages.h>

typedef enum {
    EventTypeTick,
    EventTypeInput,
} EventType;

typedef struct {
    EventType type;
    InputEvent input;
} HelloWorldEvent;

static void draw_callback(Canvas* canvas, void* ctx) {
    UNUSED(ctx);

    canvas_clear(canvas);
    canvas_set_font(canvas, FontPrimary);
    canvas_draw_str(canvas, 0, 10, "Hello World!");
}

static void input_callback(InputEvent* input_event, void* ctx) {
    // Check that the context is not null
    furi_assert(ctx);
    FuriMessageQueue* event_queue = ctx;

    HelloWorldEvent event = {.type = EventTypeInput, .input = *input_event};
    furi_message_queue_put(event_queue, &event, FuriWaitForever);
}

static void timer_callback(FuriMessageQueue* event_queue) {
    // Check that the context is not null
    furi_assert(event_queue);

    HelloWorldEvent event = {.type = EventTypeTick};
    furi_message_queue_put(event_queue, &event, 0);
}

int32_t hello_world_app(void* p) {
    UNUSED(p);

    // The current custom HelloWorldEvent
    HelloWorldEvent event;
    // A queue for eight events, each the size of HelloWorldEvent
    FuriMessageQueue* event_queue = furi_message_queue_alloc(8, sizeof(HelloWorldEvent));

    // Create a new view port
    ViewPort* view_port = view_port_alloc();
    // Set a drawing callback without context
    view_port_draw_callback_set(view_port, draw_callback, NULL);
    // Set a button callback, passing our message queue as context
    // so that button events can be placed in it
    view_port_input_callback_set(view_port, input_callback, event_queue);

    // Create the application GUI
    Gui* gui = furi_record_open(RECORD_GUI);
    // Attach the view port to the GUI in full-screen mode
    gui_add_view_port(gui, view_port, GuiLayerFullscreen);

    // Create a periodic timer whose callback receives our event queue
    // as its context
    FuriTimer* timer = furi_timer_alloc(timer_callback, FuriTimerTypePeriodic, event_queue);
    // Start the timer
    furi_timer_start(timer, 500);

    // Process the event queue forever
    while(1) {
        // Read an event from the queue into event, waiting forever if the queue is empty,
        // and check that the operation succeeded
        furi_check(furi_message_queue_get(event_queue, &event, FuriWaitForever) == FuriStatusOk);

        // The event is a button press
        if(event.type == EventTypeInput) {
            // Leave the loop, and therefore the application, when Back is pressed
            if(event.input.key == InputKeyBack) {
                break;
            }
            // The event is a timer tick
        } else if(event.type == EventTypeTick) {
            // Do something on the timer
        }
    }

    // Free the timer
    furi_timer_free(timer);

    // Free the memory used by the queue
    furi_message_queue_free(event_queue);

    // Clean up the interface objects
    gui_remove_view_port(gui, view_port);
    view_port_free(view_port);
    furi_record_close(RECORD_GUI);

    return 0;
}
We can verify that the resulting code once again compiles and works. Nothing happens on a timer tick yet, however. Let us fix that too.
Blinking the LED
As far as I understand, blinking is one type of notification on the Flipper. Using notifications follows the same logical pattern:
- initialise the notification service to which we will send notifications;
- send notifications when needed;
- close the notification service at the end.
We proceed exactly as described. Add this to the initialisation block of our main function:
NotificationApp* notifications = furi_record_open(RECORD_NOTIFICATION);
Add this where timer ticks are handled:
notification_message(notifications, &sequence_blink_blue_100);
And add this at the end:
furi_record_close(RECORD_NOTIFICATION);
We have acquired a magical constant named sequence_blink_blue_100, which specifies the notification code for blinking the blue LED. It is actually defined in the included notification/notification_messages.h. That file contains plenty of other interesting things, such as blinking the red LED, but this one example is enough for us. The blue LED now flashes on every timer tick.
The complete code:
#include <stdio.h>
#include <furi.h>
#include <gui/gui.h>
#include <input/input.h>
#include <notification/notification_messages.h>

typedef enum {
    EventTypeTick,
    EventTypeInput,
} EventType;

typedef struct {
    EventType type;
    InputEvent input;
} HelloWorldEvent;

static void draw_callback(Canvas* canvas, void* ctx) {
    UNUSED(ctx);

    canvas_clear(canvas);
    canvas_set_font(canvas, FontPrimary);
    canvas_draw_str(canvas, 0, 10, "Hello World!");
}

static void input_callback(InputEvent* input_event, void* ctx) {
    // Check that the context is not null
    furi_assert(ctx);
    FuriMessageQueue* event_queue = ctx;

    HelloWorldEvent event = {.type = EventTypeInput, .input = *input_event};
    furi_message_queue_put(event_queue, &event, FuriWaitForever);
}

static void timer_callback(FuriMessageQueue* event_queue) {
    // Check that the context is not null
    furi_assert(event_queue);

    HelloWorldEvent event = {.type = EventTypeTick};
    furi_message_queue_put(event_queue, &event, 0);
}

int32_t hello_world_app(void* p) {
    UNUSED(p);

    // The current custom HelloWorldEvent
    HelloWorldEvent event;
    // A queue for eight events, each the size of HelloWorldEvent
    FuriMessageQueue* event_queue = furi_message_queue_alloc(8, sizeof(HelloWorldEvent));

    // Create a new view port
    ViewPort* view_port = view_port_alloc();
    // Set a drawing callback without context
    view_port_draw_callback_set(view_port, draw_callback, NULL);
    // Set a button callback, passing our message queue as context
    // so that button events can be placed in it
    view_port_input_callback_set(view_port, input_callback, event_queue);

    // Create the application GUI
    Gui* gui = furi_record_open(RECORD_GUI);
    // Attach the view port to the GUI in full-screen mode
    gui_add_view_port(gui, view_port, GuiLayerFullscreen);

    // Create a periodic timer whose callback receives our event queue
    // as its context
    FuriTimer* timer = furi_timer_alloc(timer_callback, FuriTimerTypePeriodic, event_queue);
    // Start the timer
    furi_timer_start(timer, 500);

    // Enable notifications
    NotificationApp* notifications = furi_record_open(RECORD_NOTIFICATION);

    // Process the event queue forever
    while(1) {
        // Read an event from the queue into event, waiting forever if the queue is empty,
        // and check that the operation succeeded
        furi_check(furi_message_queue_get(event_queue, &event, FuriWaitForever) == FuriStatusOk);

        // The event is a button press
        if(event.type == EventTypeInput) {
            // Leave the loop, and therefore the application, when Back is pressed
            if(event.input.key == InputKeyBack) {
                break;
            }
            // The event is a timer tick
        } else if(event.type == EventTypeTick) {
            // Send the notification that flashes the blue LED
            notification_message(notifications, &sequence_blink_blue_100);
        }
    }

    // Free the timer
    furi_timer_free(timer);

    // Free the memory used by the queue
    furi_message_queue_free(event_queue);

    // Clean up the interface objects
    gui_remove_view_port(gui, view_port);
    view_port_free(view_port);
    furi_record_close(RECORD_GUI);

    // Close the notification service
    furi_record_close(RECORD_NOTIFICATION);

    return 0;
}
And now for the final demonstration!